Night Time Photography

Fiat Step by Step Photo Shoot

As well as photographing people and events I also get to photograph another of my passions, classic and supercars.

A couple of years ago I was commissioned to photograph a private collection of classic and supercars as a special gift to the owner from his wife, so he could see and appreciate his collection all together in one place. The result was a beautiful handcrafted, limited edition photography book.

It was important to me to make sure that we had planned where each car was to be photographed - the location, the time of day and the lighting, the rest is instinctive. There were over 20 cars in the collection and each one had it's own character I wanted to showcase.

Every location chosen had a special meaning to the owners and each came with it's own challenges, but one in particular stayed in my mind and it's this one I'd like to share with you, the Fiats - their two everyday cars, that they most probably have spent most time in.

The photographs below give a brief outline of the step by step process I went through to get to the end result.

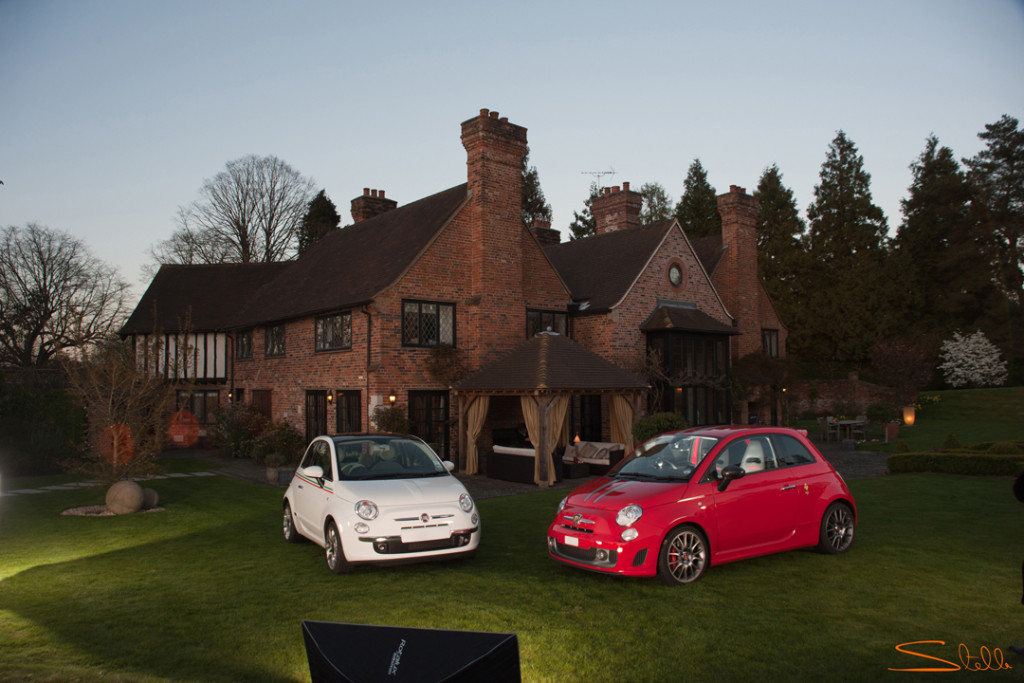
I chose to do this shoot at the beginning of May so we could spend the afternoon setting up in preparation for when the sun went down. I had postponed this numerous times as the conditions weren't right. The first photograph above shows the cars in position.

The above photograph shows the angle I positioned my tripod with the Nikon D700 firmly attached, the lens I used was the 24-120mm. I set my Nikon SB910 speed light remotely inside the Fiat Abarth, with lighting at the front and either side of the cars. There was a flicker of light from the house and a couple of domestic outside lights too.

98bc8b4f-9365-48e4-90dc-a78560cfebd1

As the sun began to set an additional light was added in the outside seating area, with a flicker from the tea lights on the table and to the right of the house as well.

From the image above you will notice that lights have been added to the tree on the left and another garden light to match the one on the right. Many exposures were taken so I could check the lighting was just how I wanted it, my lighting technician was very patient as we balanced the lights to compliment the lighting inside the house. It was precision timing to balance this before we had lost all the natural light.

The end result below, is just as I had imagined, with some careful tweaking in Photoshop to achieve the results I wanted below.

8a0b7269-1221-44f6-83cb-27c28dc31624

Exhibition

This photograph and others from the book will be featured at the RAC in Pall Mall in the Autumn, with the opportunity to buy limited edition framed photographs. A small selection will also be on display at Hever Castle for Father's Day on Sunday 21 June 2015. I'll keep you posted as we get nearer the time.

If after reading this it has inspired you to commission a shoot please do get in touch.

Thanks for reading, I'll be back in two weeks time with more news.

Happy Easter.

Stella

Tips on Night Time Festive Photography

Photographing Festive Lights at Night

Don't you just love this time of year with the vibrant autumnal colours by day and the variety of colours the Christmas lights project at night? Let me tell you more about photographing festive lights at night.

I want to share with you the best way to photograph at night to capture how spectacular the lights look. Don't leave it up to your camera to decide what setting is best, you'll be disappointed with the results.

Just follow the tips below to get the best out of your DSLR.

  • Use a good sturdy tripod or a gorilla pod if travelling light or want to attach your camera to railings.

  • Select manual mode on your camera.

  • Set White Balance (WB) to AUTO

  • Select 200 ISO

  • Use a memory card at least 8GB - 32GB if selecting RAW files

  • Select L file size - I like to shoot RAW as well as JPEG to record maximum data- this will use a lot more memory.

  • Find where the delayed timer is on your camera and select 10 seconds, this will help settle your camera once you have pressed the shutter to prevent camera shake.

  • Set your aperture to f16.

  • Set your shutter speed to 10" (seconds).

  • Find where your histogram is so you can check the exposure after the first shot.

  • You may need to select manual focus if it is too dark for auto focus.

SMS Creative Photography Oxted Christmas Lights at Night Photography

Now You Are Ready

First find a spot where you want to position yourself and attach your camera to the tripod, make sure it is tight and secure, especially if it is windy and/or there are lots of people walking by.

You don't always have to shoot at eye level, some of the best shots taken are just above ground level, decide what you would like to create.

I have taken many classes at night shooting in Westminster looking over the bridge towards the London Eye, with the camera settings as above.

The benefits of the low ISO and the slow shutter speed are that it allows the camera sensor to pick up the variety of tones and colours, especially if the colours are changing during the 10 second exposure or something is moving.

During the slow exposure the water on the Thames appears very smooth and the wheel is blurred. Take a look at the example below that a participant took during one of my classes.

One thing not to forget is the 10 seconds you have selected to allow the camera to still itself before the exposure, most cameras flash during this time. Don't be tempted to touch your camera until after the full exposure.

You can tweak the exposure by increasing or decreasing the shutter speed once you have seen the image and checked the histogram.

SMS Creative Photography Night Time Photography Westminster

The image below, with the trail lights from a passing bus was taken in the same way as the Oxted and Thames photograph. The skill of this image is the timing as you can miss the moment and is often trial and error, but worth the results.

SMS Creative Photography night Time Photography Class Westminster 1

Would you like to come to one of my classes to achieve great results?  Gather a group of four friends to spend a couple of hours in Oxted or Westminster to produce your own set of photographs like these, please get in touch on 01883 722282

I hope you have found this newsletter 'Tips On Night time Festive Photography' informative, just keep persevering to achieve the results you want, it will be well worth it.

You may just get the photograph you want to use as this years Christmas card.

Christmas Fun

A reminder that next Saturday 6 December is the 'Love Oxted Christmas Festival' for a fun filled family day to get into the Christmas spirit. On this day only, our studio sitting offer, take a look at this link to find out more, just two appointments left.

From 6 - 21 December American Express card holders can use their card with us and and they will give you a £5 statement credit, this is to promote their 'Shop Small' campaign to support local participating businesses.

Thanks for reading

Bye for now.

Stella