This is how I do it!
First of all to be a great wedding photographer you have to have passion and buckets of it helps, a passion for the art of photography and a passion for communicating with people, this is a winning combination. I’ve been photographing weddings for over 35 years and started with a twin lens Rolleiflex using four rolls of film with only 12 exposures on each, so every shot counted and you had to get it right!! Let me tell you how you can do it with these wedding photography tips.
Passion
Passion isn’t something you can buy you need it to be able to get the results as this is probably one of the hardest genres of photography but probably one of the most rewarding, after all you have been entrusted with a very special day there really is no margin for error. Location Always make sure you have visited the location the wedding is taking place at so you are familiar with the best spots for group photographs, bride and groom shots and where the sun is positioned at the time of day you’ll be shooting. A plan B is a must in case rains prevents any outdoor photography, so check the inside of the venue too (especially if it's a church ceremony).
My Kit Keep it simple!
You have a lot to think about on the day - who’s who, what’s the weather doing, am I in the right place at the right time, the names of the people you are interacting with, is my exposure correct with the changing light. Knowing your kit inside out is crucial to be able to make split second decisions. I carry two D700 Nikon bodies with additional battery attachments that way I don’t have to worry my batteries are going to die, after approximately 1000 exposures the second battery automatically kicks in. One body is fitted with a 70mm-200mm lens and the other a 24mm-135mm lens. I use a Nikon speedlight attached to my shorter focal length lens body as a fill in light source and also as a main light when shooting inside. I carry a foldaway reflector too, you never know when you might need it, especially for natural window light shots. In reserve I carry two more bodies as backup and a wider focal 18mm lens should I need to introduce this lens for the back of the ceremony wide angle shot. I often shoot with a second photographer as it’s impossible to get all angles covered, especially during the ceremony when roaming photographers are a big no no. I carry a sturdy tripod to prevent camera shake if I need a slow shutter speed in the church, as any supplementary lighting is often forbidden and natural lighting is far more complimentary. Make sure your 32gb memory cards are formatted and ready to go. I carry a light metre with me so I can get an accurate reading, I check this with the histogram on my camera too. In my kit bag I carry two spare flash guns with charged batteries and lens cloth cleaners.
Camera Settings
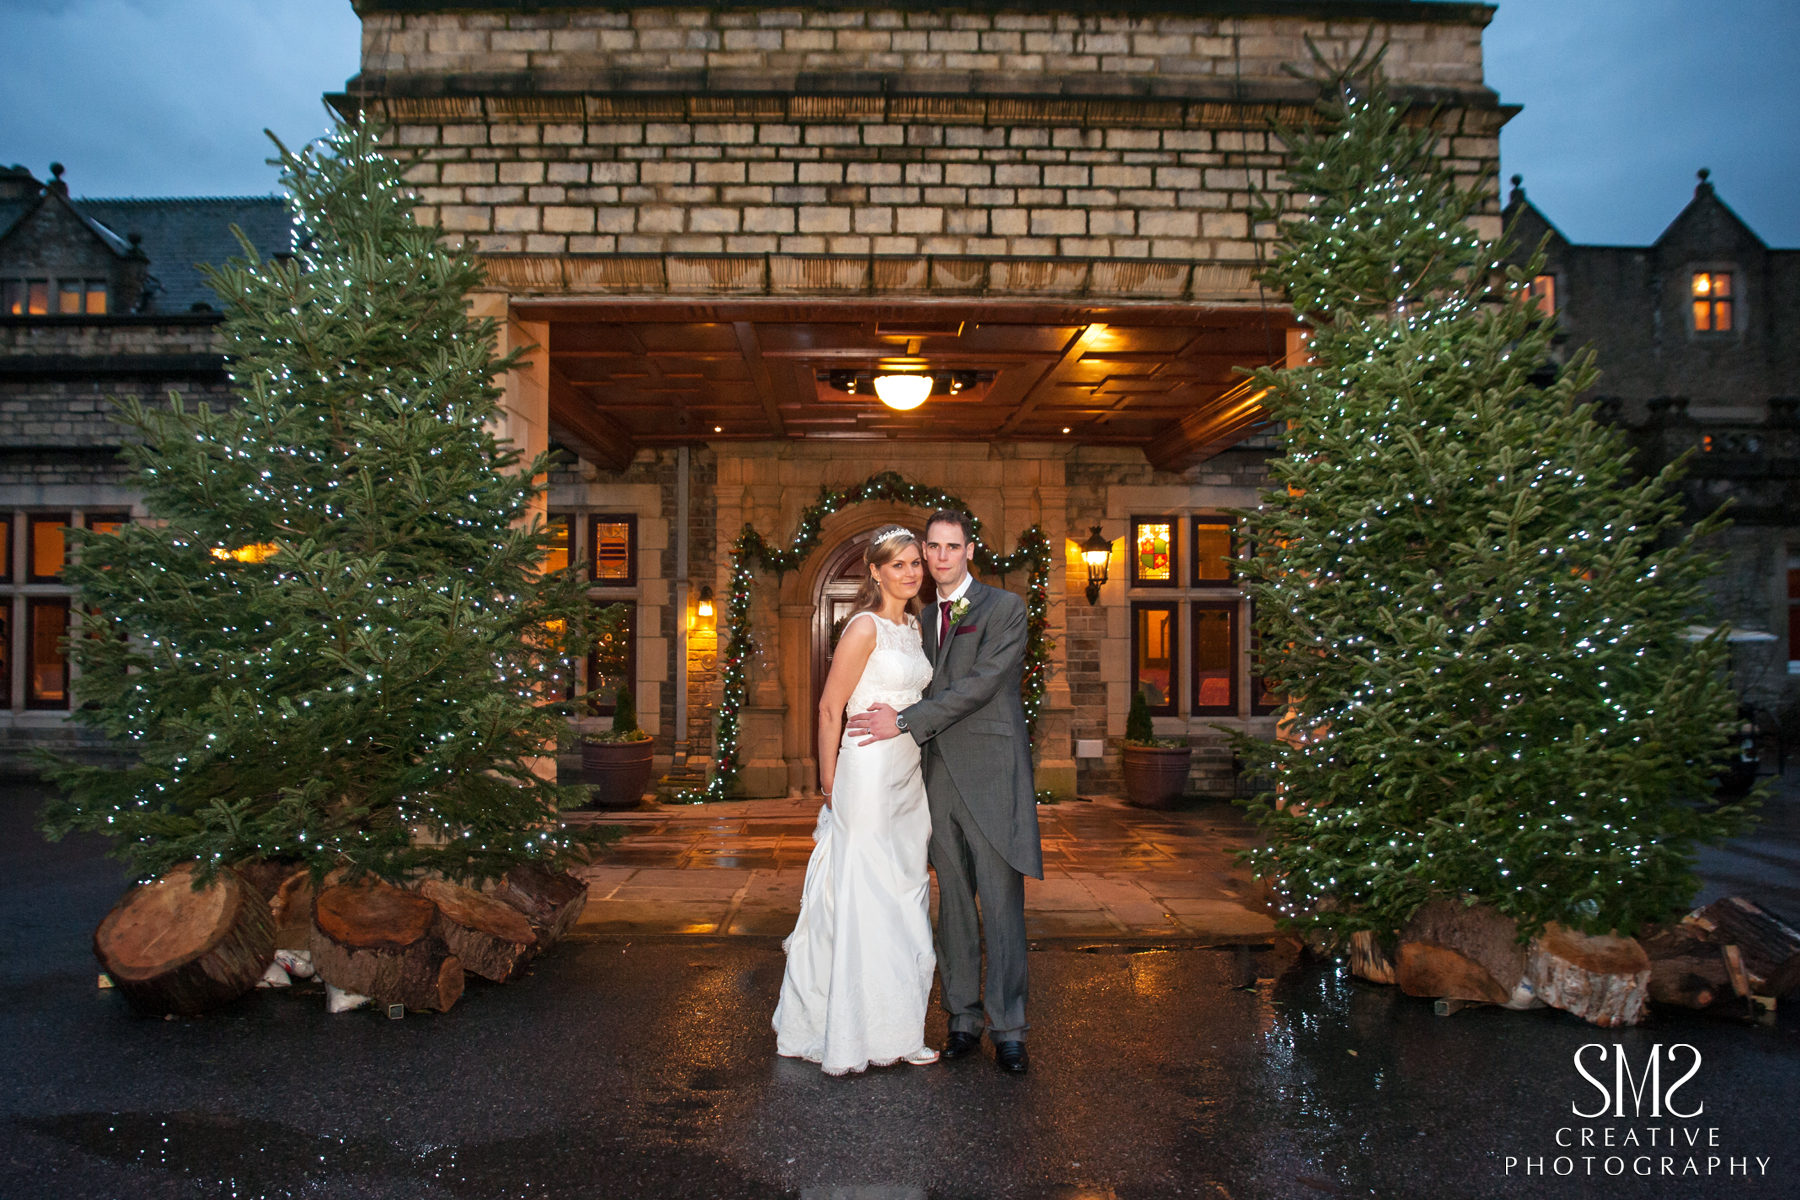
I choose to set the shooting control on my camera to manual so I can have full control of any given lighting. I have my flash set to manual too and set to two stops under the exposure of the camera so it should deliver the correct dose of light to fill in the shadows of group photographs or, for when your subject is backlight, full flash is best. This is something that over the years becomes second nature as does the camera settings. I generally set my ISO to 400 but change to 1600 for internal shots in low lighting and often use a low dose of flash too, this all depends on what my experience is telling me. I always set my camera file size to JPEG normal and RAW so I have two files of each image. A typical combination when shooting on a bright day is shutter speed 250th and aperture f11. When using my camera fitted with the 70mm – 200mm lens I don’t use flash and sometimes set this on aperture priority of f4 or f5.6 so I can shoot on a fast shutter speed in bright lighting. The image below is an example of this, I have used the backlighting and flare to my advantage, as usual these shots are rarely planned and capture the moment. I have my white balance (WB) set to auto, this is fine tuned in post production. Another crucial thing that makes life easier when you are sorting all the images from two or three memory cards together in one folder, is to set your cameras all to the same time, otherwise you’ll be doing lots of sorting to get everything in chronological order. You don't want to put yourself in this position.

Post production
Once I have downloaded the images usually between 1000 to 1500 images the editing takes place, this is a lengthy process and often takes place over two or three days. All images I take whether in the studio on location or weddings go through a fine tuning post production process prior to printing to ensure they are true in colour, this too is a lengthy but necessary process to ensure optimum quality. The RAW file (up to 10mb each) records maximum data, this helps if you are caught out and have over or under exposed your file, the RAW file will allow you to retrieve the data that a JPEG wouldn’t. Don't rely on this as it's always best to get the exposure right to start.
What Next If you would like your wedding photographed please call the studio to check we have your date available I am only taking 8 wedding commissions a year to ensure I can give them the time and attention they each deserve. To learn more about photography and understanding your camera, my masterclasses with give you the confidence to take better photographs.These can be small group classes or on a one to one basis. My classes will give you valuable wedding photography tips that you can use whatever you are photographing.
Thanks for reading!
Bye for now.
Stella